How to View and Download Your Unofficial Transcript on GCU Portal

If you’re a Grand Canyon University (GCU) student and you need proof of your academic progress, an unofficial transcript is often the fastest way to get it. Whether you’re applying for a scholarship, transferring credits, verifying your GPA, or simply keeping your own academic records up to date, knowing how to access your unofficial transcript on the GCU Student Portal can save you a lot of time and hassle.
Unlike an official transcript, which usually requires a formal request, a processing fee, and a few days of waiting, an unofficial transcript is available instantly through your student account. In this guide, we’ll walk you through the exact steps to view and download your unofficial transcript on the GCU portal, explain what information it includes, and answer some of the most common questions students have about the process.
What Is an Unofficial Transcript?
An unofficial transcript is a self-service document that shows your complete academic history at GCU, including the courses you’ve taken, grades earned, credit hours completed, and your cumulative GPA. It does not carry the university seal or registrar’s signature the way an official transcript does, which means it’s not typically accepted for formal purposes like transferring to another university or applying for certain jobs.
However, an unofficial transcript is extremely useful for personal reference. It lets you:
- Quickly check your current GPA
- Track your progress toward degree completion
- Review grades for individual courses
- Confirm that your enrollment history is accurate
- Prepare for academic advising appointments
Because it’s generated instantly through the student portal, there’s no waiting period and no fee involved, making it the go-to option whenever you need a quick snapshot of your academic record.
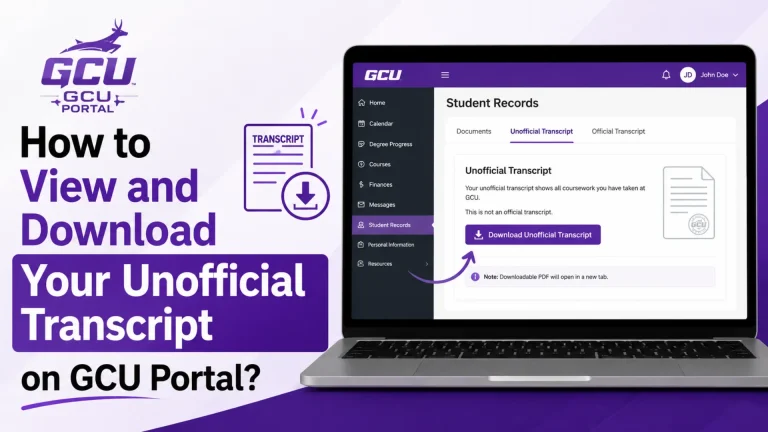
How to View and Download Your Unofficial Transcript on GCU Portal
Accessing your unofficial transcript through the GCU Student Portal is a simple process that takes just a couple of minutes. Follow these steps carefully to make sure you don’t miss anything.
Step 1: Log Into the GCU Student Portal
Start by logging into your GCU Student Portal using your official university credentials (your student email and password). If you’ve forgotten your login details, GCU’s IT Help Desk can assist you in resetting your password. Make sure you’re using a stable internet connection, especially if you plan to download and save the transcript afterward.
Step 2: Navigate to the Academics Tab
Once you’re logged in, look for the Academics tab on your student dashboard. This section houses all of your academic-related tools, including course registration, degree progress, grades, and transcript access. Click on it to expand the available options.
Step 3: Scroll Down to the Student Transcript Section
Within the Academics tab, scroll down until you locate the Student Transcript section. This is a dedicated area specifically designed for transcript-related requests and viewing options. It’s usually positioned below your course history and grade summary widgets.
Step 4: Click “View Unofficial Transcript”
Inside the Student Transcript section, you’ll see an option labeled “View Unofficial Transcript.” Click on this link to proceed to the transcript request form.
Step 5: Select “All Levels” and “Web”
You’ll now be prompted to choose a few options before generating your transcript:
- For the level selection, choose “All Levels.” This ensures the transcript includes your complete academic record, whether you’ve taken undergraduate, graduate, or a combination of courses.
- For the format, select “Web.” This generates the transcript directly in your browser rather than requesting a mailed or emailed copy.
Choosing these two options ensures you get the most comprehensive and immediately accessible version of your transcript.
Step 6: Click Submit
After selecting the appropriate options, click the Submit button. The system will process your request and generate your unofficial transcript within seconds. There’s no waiting period since this is a self-service, real-time feature built into the portal.
Step 7: Download or Save as PDF
Once your transcript appears on the screen, you can save it for future use. Since the portal doesn’t always provide a direct “download” button, the easiest method is to use your browser’s print feature:
- Right-click on the transcript page (or use the keyboard shortcut Ctrl+P on Windows or Cmd+P on Mac).
- In the print dialog box, change the destination/printer option to “Save as PDF.”
- Click Save, choose a location on your computer, and confirm.
This will create a digital PDF copy of your unofficial transcript that you can store, email, or print whenever needed.
Tips for a Smooth Transcript Retrieval Process
To avoid any hiccups while accessing your unofficial transcript, keep these tips in mind:
- Use a desktop or laptop browser rather than a mobile device, since portal layouts and print options are often easier to manage on larger screens.
- Update your browser to the latest version to prevent display issues within the portal.
- Disable pop-up blockers temporarily, as some transcript pages open in a new window or tab.
- Double-check your selections (“All Levels” and “Web”) before submitting, since choosing the wrong option may generate an incomplete transcript.
- Save multiple copies in different folders or cloud storage (like Google Drive or OneDrive) so you always have backup access.
Why You Might Need Your Unofficial Transcript
Students request unofficial transcripts for a variety of reasons throughout their academic journey. Some of the most common scenarios include:
- Academic advising sessions, where advisors may ask to see your current standing.
- Scholarship or grant applications that require proof of GPA or enrollment status.
- Internship or job applications where employers want a general overview of your coursework.
- Personal tracking, especially for students juggling multiple majors, minors, or transfer credits.
- Verifying data entry errors, such as confirming that a recent grade or credit was correctly recorded.
Because the process is quick and doesn’t involve the registrar’s office, it’s a convenient tool to use anytime you need a fast reference point.
Unofficial vs. Official Transcript: Key Differences
It’s worth understanding the difference between these two document types so you request the right one for your needs.
| Feature | Unofficial Transcript | Official Transcript |
|---|---|---|
| Access | Instant, self-service via portal | Requires formal request |
| Cost | Free | May involve a processing fee |
| Turnaround Time | Immediate | Several business days |
| University Seal/Signature | Not included | Included |
| Accepted For | Personal use, advising | Transfers, employers, licensing boards |
If you need a transcript for official purposes like transferring to another institution you’ll need to request an official transcript through GCU’s registrar office instead, which typically involves a small fee and a short processing period.
Conclusion
Accessing your unofficial transcript on the GCU Student Portal is a straightforward process once you know where to look. By logging into your account, heading to the Academics tab, and following the simple steps to select “All Levels” and “Web,” you can view your complete academic record in seconds. From there, using your browser’s print function to save it as a PDF ensures you always have a digital copy on hand whenever you need it.
Whether you’re checking your GPA before an advising meeting, applying for a scholarship, or just want a personal record of your progress, this quick self-service feature makes staying on top of your academics easier than ever. Bookmark this guide so you can revisit the steps anytime you need a fresh copy of your unofficial transcript.